Sanding a Floor With a Floor Sanding Machine

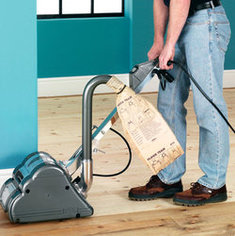
Electric floor sanders are great for use in both industrial or domestic environments to remove imperfections, paint, stains and varnish; to create the perfect surface for a new coat of varnish. As the sandpaper spins around on the drum, it removes the old, tired layer of wood from the floorboards, unveiling beautiful, fresh floorboard below. The wood dust is then sucked up into the dust bag, which should be replaced, once full, with a new bag.
To prepare the floor for sanding, remove any obstacles, including furniture and fixtures. Make sure you have safety gloves, goggles and a dust mask. Remove any old floor covering and check for raised nails or screws, as these will need to be well beneath the surface of the wood to avoid damaging the sandpaper or the floor sanding machine. Make sure you fix any loose floor boards, fill any cracks with some wood filler and replace any boards that are beyond repair. Finally, clean the floor, removing any wax, grease and dirt by hand, and give the floor a thorough sweep to clear any debris that could spoil the finish.
To use the floor sander, load the drum with sand paper, following the instructions in the manual carefully. Make sure that you use the appropriate sandpaper abrasion for the floor that you're sanding, to get the finish that you want.
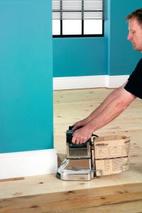
Next, position the floor sander against one wall with about two thirds of the floor in front of you. Keep the drum off the floor as you start the machine and then walk forward, slowly lowering the drum on to the wooden floor.
Walk steadily and slowly, following the direction that the floorboards are laid in, at an even pace - to avoid creating any grooves in the wood. You don't need to apply any downward force to the sanding machine, as this could cause grooves, just let the weight of the sander do the work.
As you get to the end of the pass, gradually lift the drum from the floor and repeat the process back over the same path, to where you started. To continue sanding the rest of the floor, lift the drum from the floor and position it for another run, overlapping the strip you have previously sanded by about 7cm, and repeat this cycle. You may have to repeat the entire process twice over the same surface, using different grades of sandpaper each time, to achieve the finish that you want. For the perfect finish, you can also get right into the edges of the floorboards with a floor edging sander.
|
When the sanding process is complete, you should apply around 3 layers of a good quality floor varnish. For the best finish, it is advisable to complete the varnishing process in one day.
Before using a floor sander, read the manual thoroughly, as each model may operate differently. Also ensure that you have the appropriate safety equipment, to avoid getting any dust into yours eyes or lungs, and ensure the sandpaper doesn't touch your skin whilst rotating. Make sure you switch off and unplug the sander before you try to change the sandpaper or disposable dust bag. Don't try to burn a full/used dust bag, as it may explode. Also ensure you adjust the arm of the machine to suit your arm length, to avoid injury and ensure you are fully in control of the machine. |
